Scripts Plugin For OMV7
Summary
- Openmediavault-scripts provides a tool to create scripts from the openmediavault GUI, execute those scripts, and/or schedule their execution.
- Each script will be stored in the OMV database, plus a copy of each script will be created in the shared folder configured in the plugin.
| Warning | |
|
A script has the potential to perform absolutely any action on your system. From damaging essential files to introducing a virus or hacking the server. Be very careful about copying and running a third party script. If you don't know what exactly that script is doing, you may end up losing control of your server. Use this plugin with this in mind. | |
Prerequisites
- OMV-Extras must be pre-installed.
Installation
In OMV7's GUI:
Under System, Plugins, find and highlight openmediavault-scripts 7.X, and click the install button.
- Installing the openmediavault-scripts plugin will also install the openmediavault-sharerootfs plugin as a dependency.
| Warning | |
| Do not uninstall the openmediavault-sharerootfs plugin. It is a dependency of the openmediavault-scripts plugin. Uninstalling openmediavault-sharerootfs when the openmediavault-scripts plugin is installed will cause the openmediavault-scripts plugin to be uninstalled. | |
Settings tab
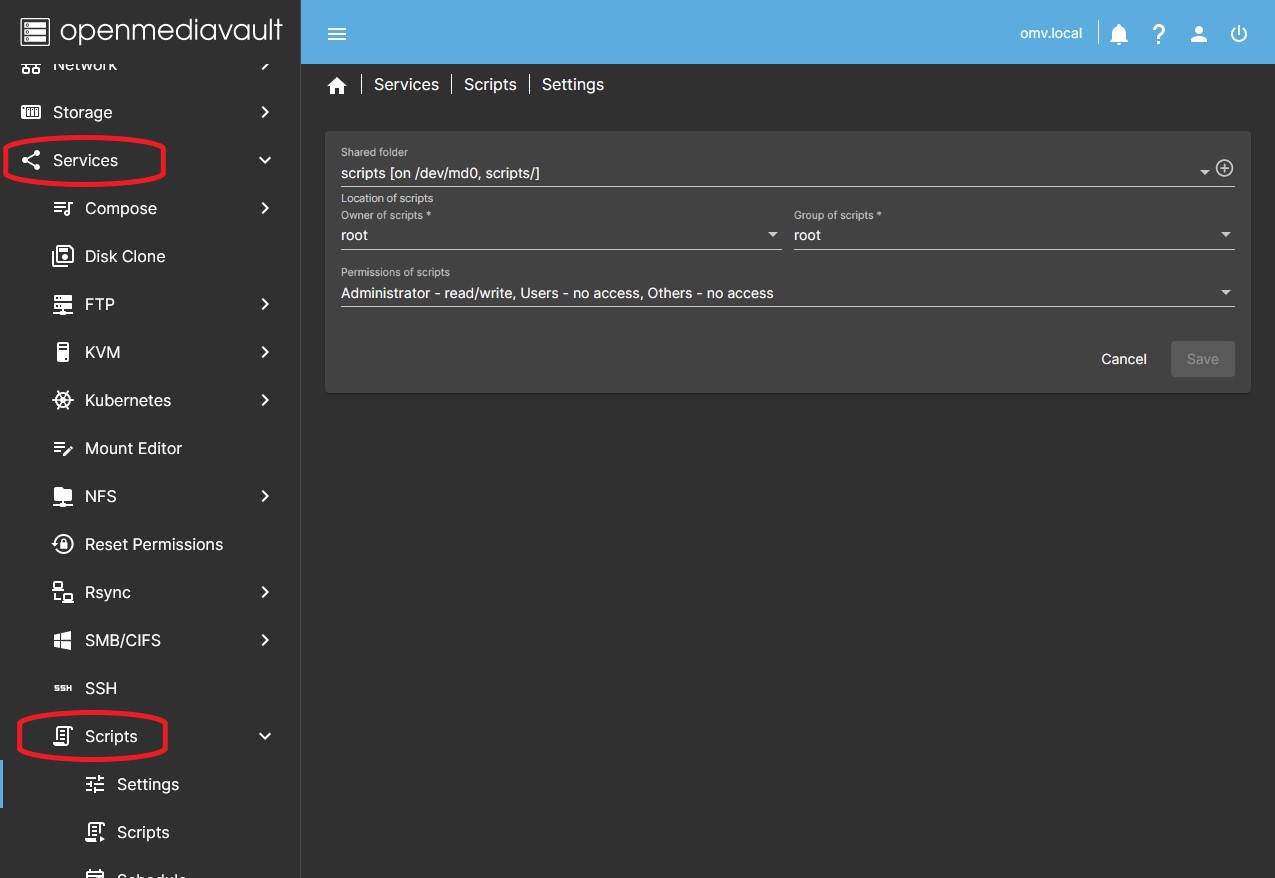
* Go to Services > Scripts > Settings and configure the initial parameters of the plugin.
Shared folder
- Choose a shared folder (or create a new one by clicking the Create button on the right). A copy of each script created with the plugin will be stored in this folder.
- This file is just a backup copy of the script. Modifications made to this file manually will not be reflected in the OMV GUI and will be overwritten if you modify the script from the plugin GUI. Use the GUI to edit your script.
- Define the owner, the owner group, and the permissions that the files stored in this folder will have using the corresponding fields.
- Press Save button.
Scripts tab
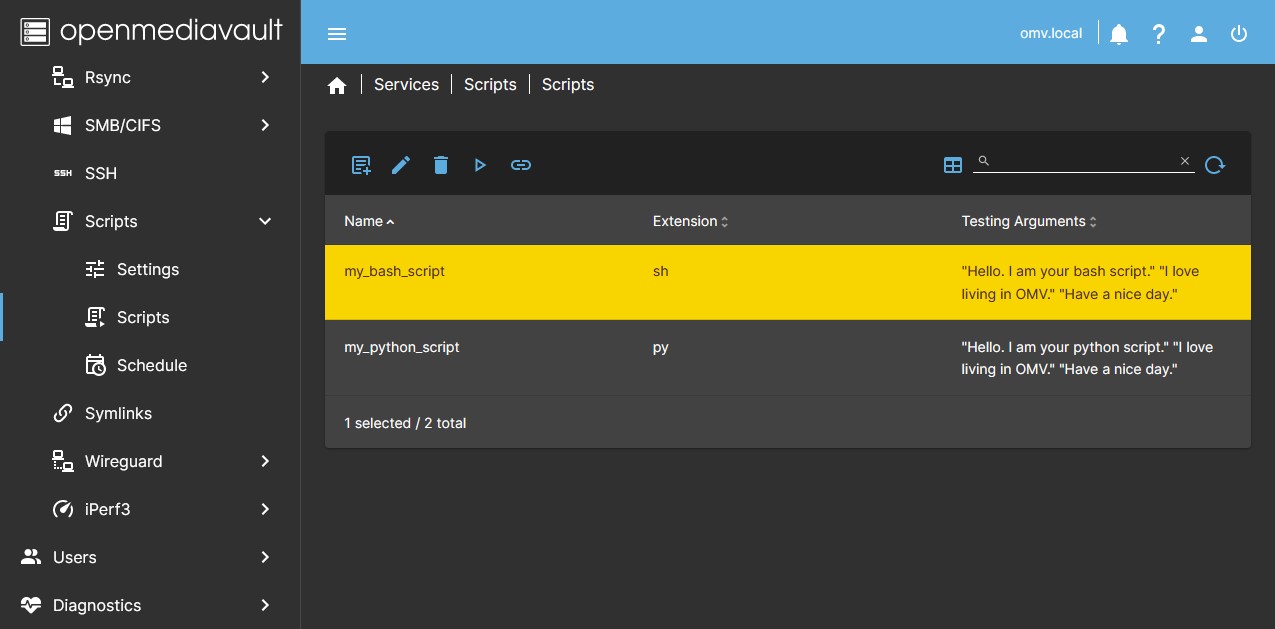
- In this form a list of the created scripts appears. Here you can create a script, edit it, delete it or run it manually.
Add
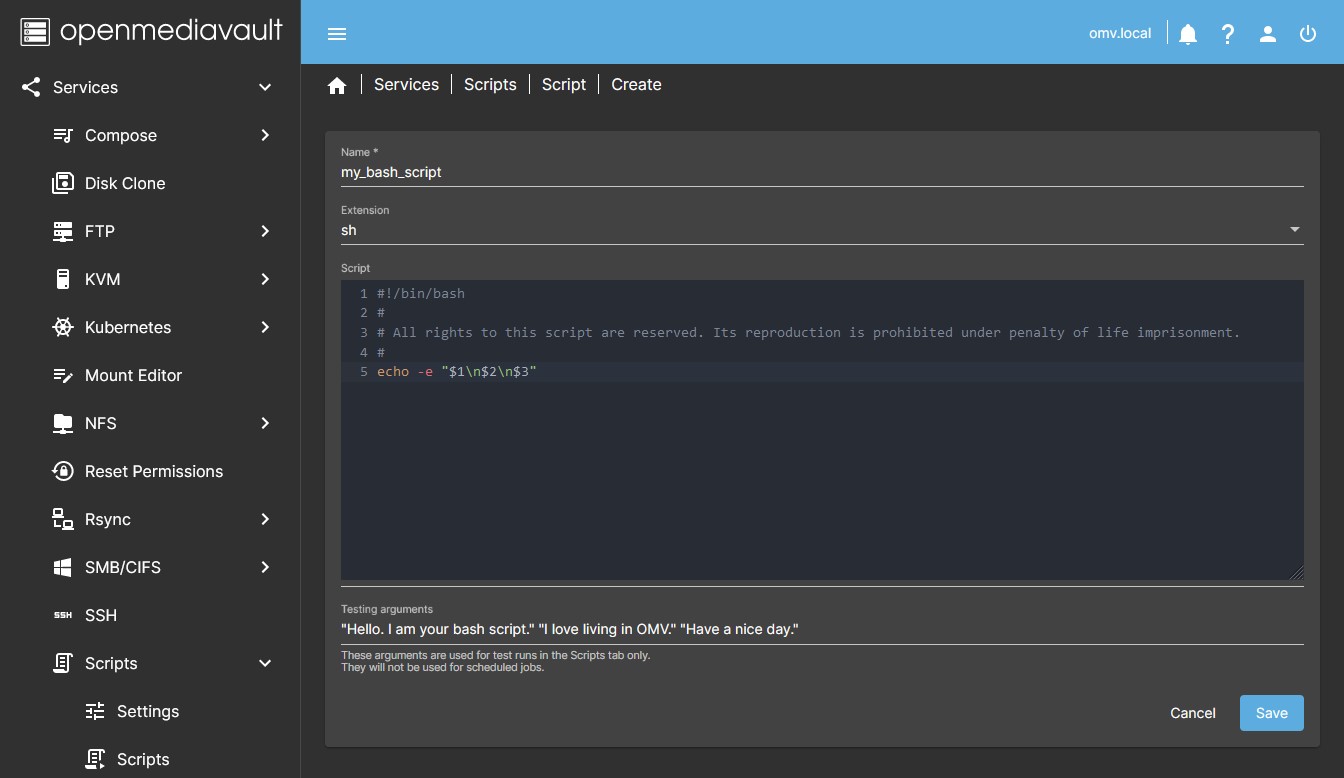
- Press the Add button and in the submenu press the Add button again to create a new script. A dialog box will open in which you must define the following fields:
- Name: This is the name with which the script will be saved and which will be used for its execution.
- Extension: This is the extension of the script. Depending on the type of script you want to create you can choose sh for bash, py for python, etc.
- Script: In this field you must write the script code. You can paste text from the clipboard.
- Testing arguments: In this field you can optionally include arguments for the execution of the script.
- These arguments will be included in the execution of the script from the Script tab only, they will not be included in the execution of the script if it is executed from the Schedule tab.
- Press the Save button to save the created script.
- The script will be stored in the OMV database
- A copy of the script will be saved in the shared folder defined in the Settings tab.
- A line with the script data will appear in the Scripts form. If you have defined arguments, they will appear in the corresponding column.
- Press the Add button and in the submenu press the Import button to import multiple scripts existing in the server file system at the same time.
- You can type the path to the folder where the scripts are or find the folder in the tree by clicking the icon on the right. It will not import any scripts that already exist in the plugin.
- Press the Add button and in the submenu press the Import one button to import a single script existing in the server file system.
- You can type the path to the file with the script in the Path field. Then press the Import button.
Edit
- Select a script on the form (yellow color) and press the Edit button on the toolbar.
- A dialog box similar to creating a script will appear.
- You can edit the script body and arguments.
- Press the Save button to save the changes and exit or the Cancel Button to exit without saving.
Delete
- Select a script on the form (yellow color) and press the Delete button on the toolbar.
- The selected script will be deleted from the OMV database and the shared folder where backups are stored.
Run
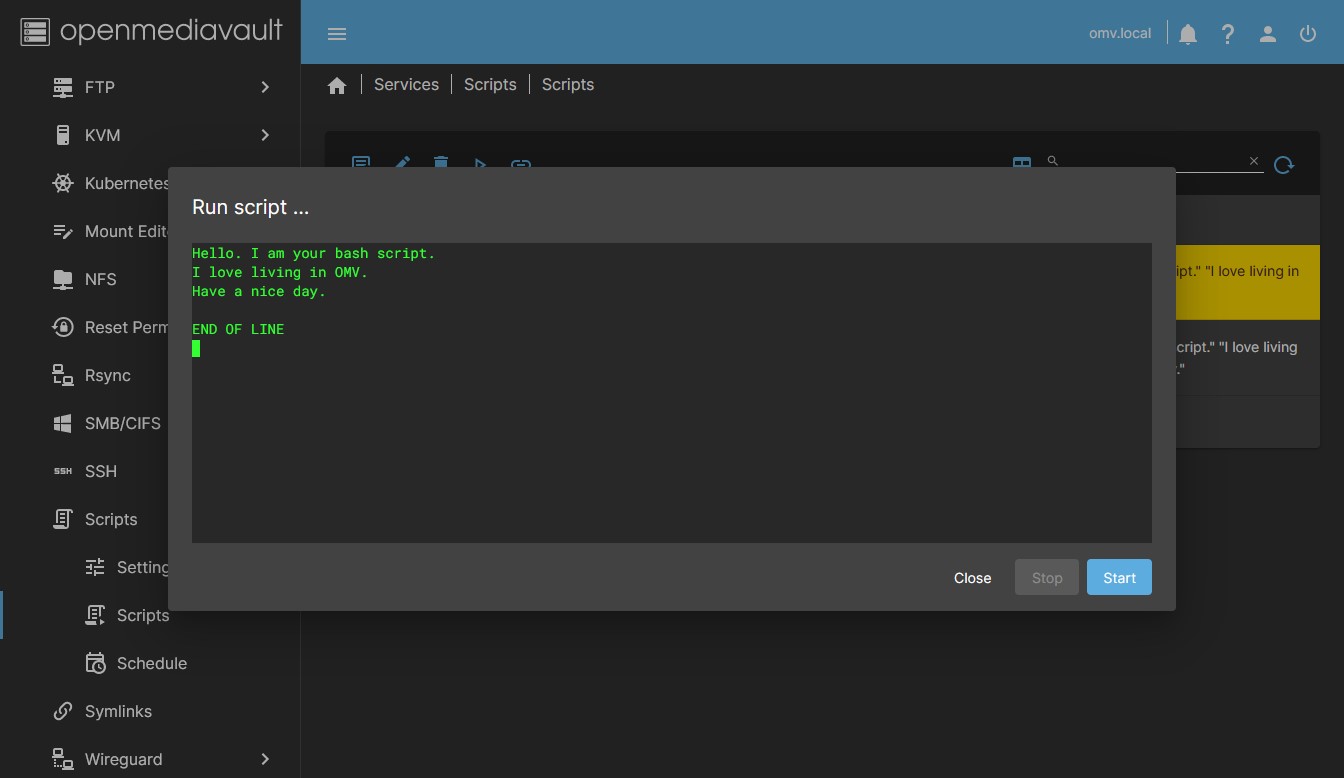
- Select a script in the form (yellow color) and press the Run button on the toolbar to manually run the script.
- A code box will appear where you can view the result of the script execution.
- Press the Start button to run the script.
- You can stop the execution of the script at any time by pressing the Stop button.
- Press Close to exit.
| Note | |
|
In this dialog box the output text of the script will be displayed. Dialogs generated with Bash Dialog or similar cannot be interacted with or displayed. | |
Docs
- Press the Docs button on the toolbar to access this document from the omv-extras wiki.
Schedule tab
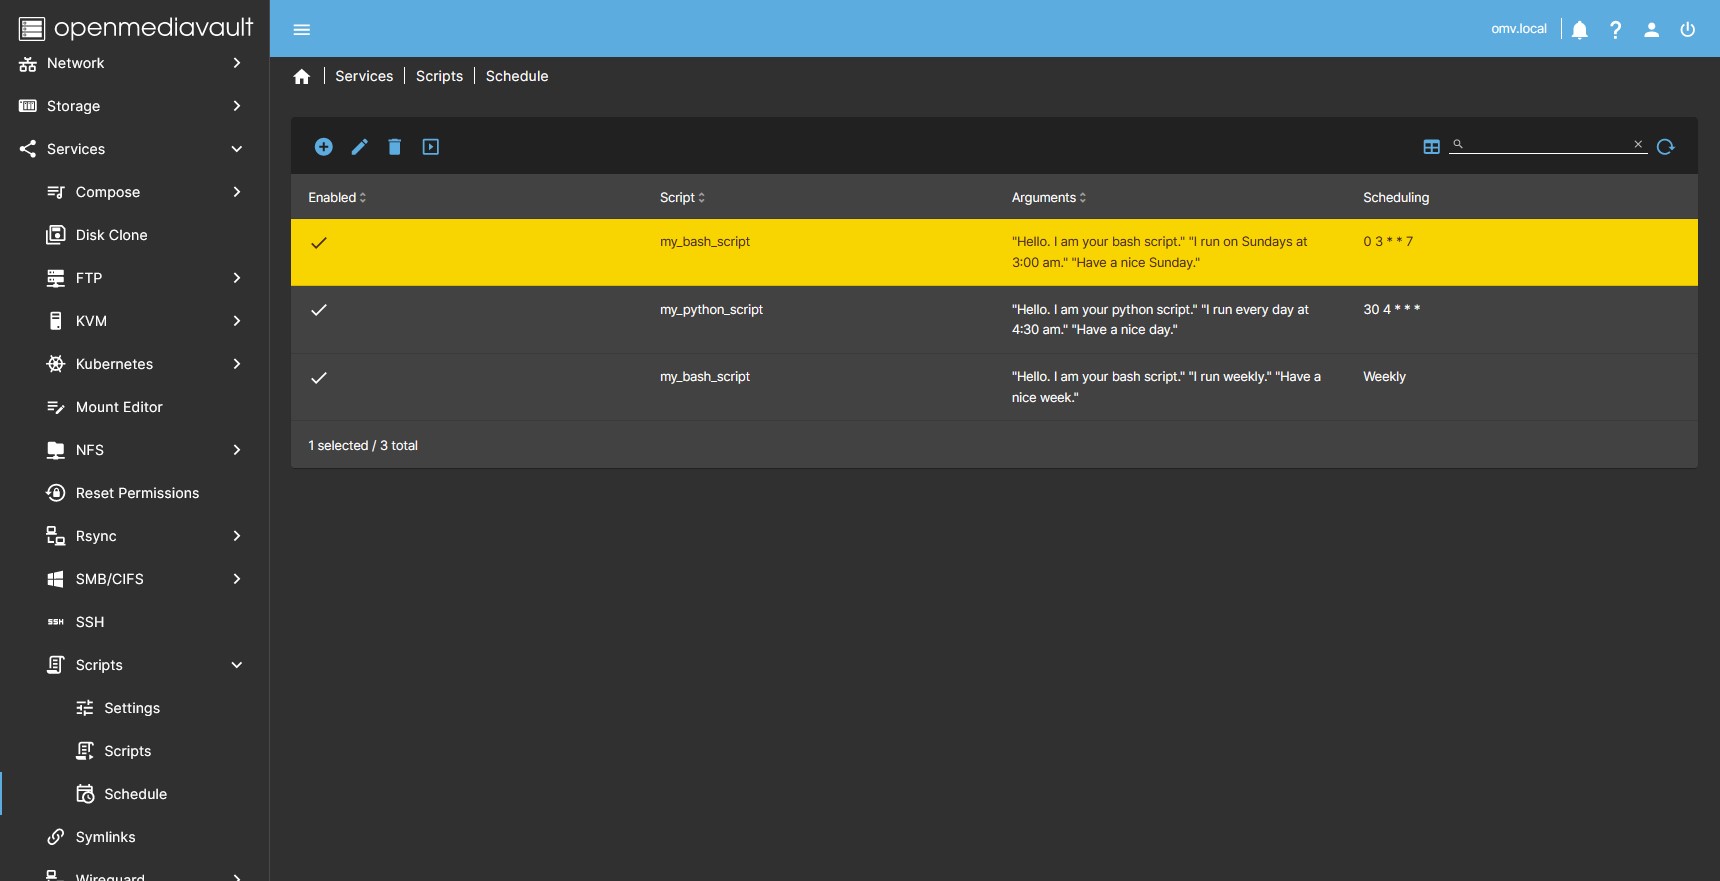
- This form displays a list of the created scheduled jobs. Here you can create a scheduled job, edit it, delete it, or run it manually.
Create
- Press the Create button on the toolbar to create a script schedule.
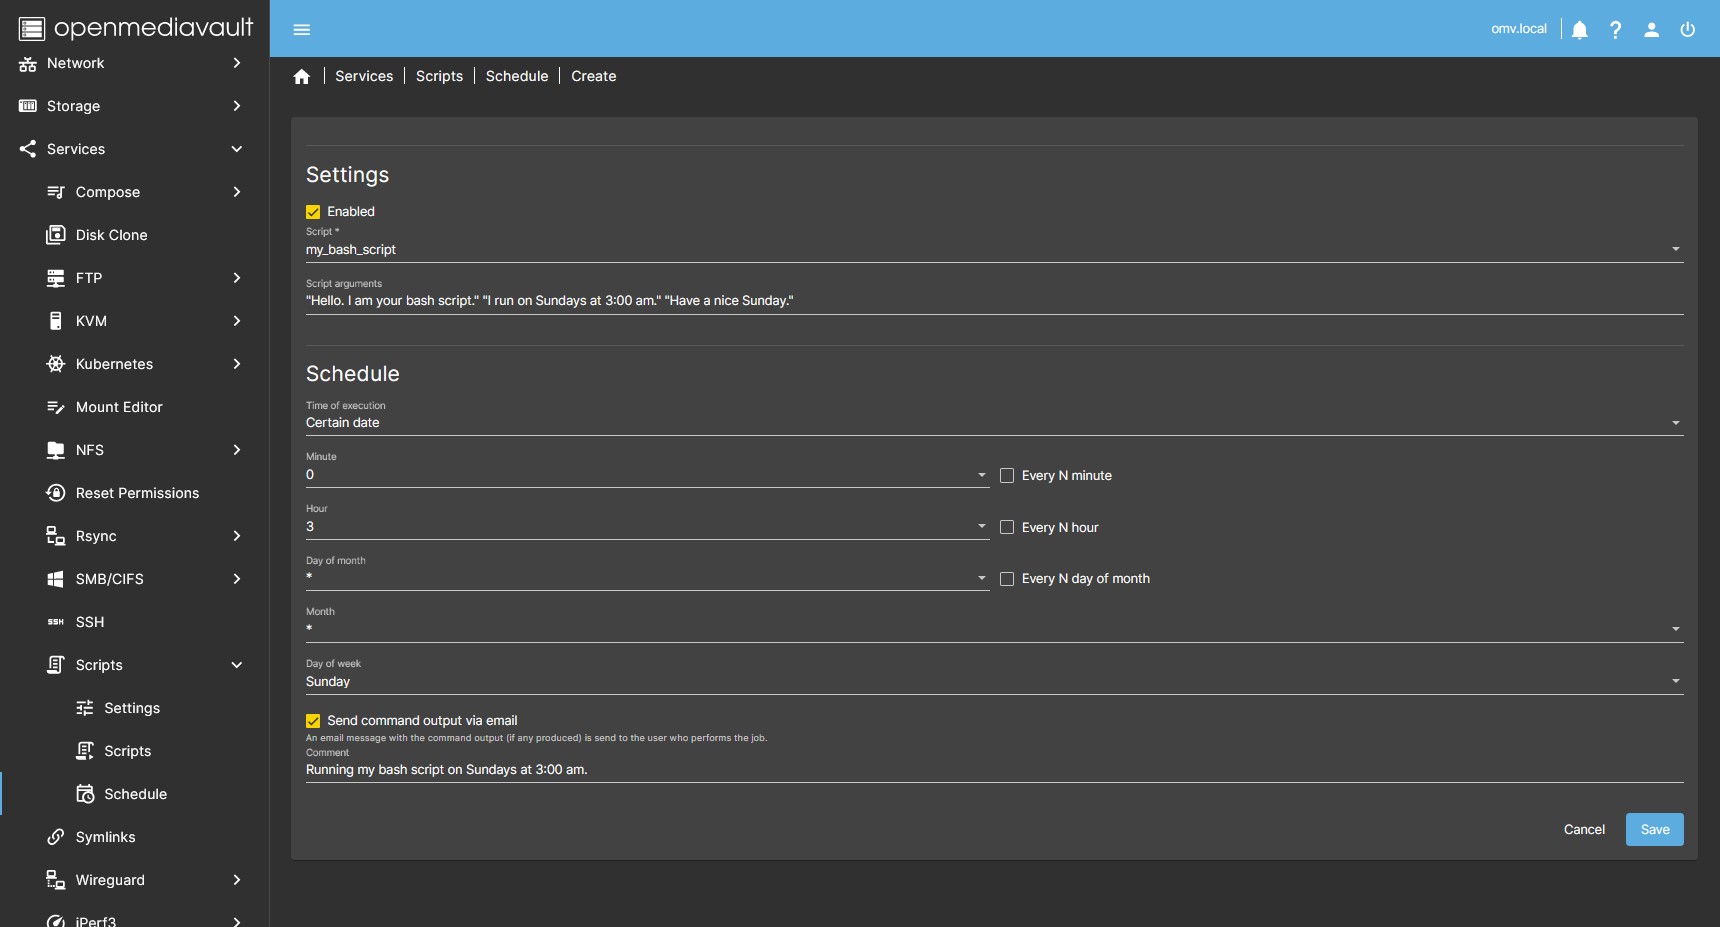
- A dialog box will open to define the schedule. You must define the following fields:
- Press Enabled to activate the scheduled execution of the script.
- In the Script field choose one of the scripts that you have previously created in the Scripts tab.
- In the Script arguments field you can optionally define arguments for the execution of the script in this schedule.
- Leave it blank if you don't need to define arguments.
- You can create different temporary schedules of the same script with different arguments.
- In the Schedule section define the temporary schedule for the execution of the script.
- In the example in the image you can see a temporary schedule defined to run on Sundays at 3:00 am.
- Press Send command output via email to receive an email after each execution of the script.
- You can add a comment in the Comment field. This comment will be the header of the email you will receive.
- You must configure notifications in the System > Notification tab for this to work.
Edit
- Select a script in the form (yellow color) and press the Edit button on the toolbar to edit a temporary schedule.
- An editing dialog box similar to the creation dialog box opens. You can edit all fields.
Delete
- Select a script in the form (yellow color) and press the Delete button on the toolbar to delete a temporary schedule.
- The selected temporary schedule will be deleted. The script or other temporary schedules of that script if they exist will not be removed.
Run
- Select a script in the form (yellow color) and press the Run button on the toolbar to manually execute the selected temporary schedule at this time.
- A dialog box will open showing the execution of the script.
- You can run it by pressing the Start button.
- You can stop the execution at any time by pressing the Stop button.
- Press Close to exit.
Source Code
A Closing Note
We, who support the openmediavault project, hope you’ve found this guide to be useful and that you’ll find your openmediavault server to be efficient, easy to use, and enjoyable.
If you found this plugin guide to be helpful, please consider a modest donation to support the hosting costs of this server.
OMV-Extras.org
Venmo: ryecoaaron

