Installing OMV5 on Armbian Buster
| Note | |
| OMV5.X is an EOL (End of Life) legacy release that is no longer supported or maintained. The current and supported version of Openmediavault is 6.X . | |
This document can be converted to a PDF file, in the user's language of choice (see the following), on Windows, Mac's and popular Linux desktop platforms. Simply select the printer icon on the upper right corner of this web page. When prompted at the client, select “print to PDF”, name and save the file.
Google Translate kann Wiki-Dokumente in Ihre Sprache übersetzen. Fügen Sie die Wiki-URL in das linke Fenster ein und öffnen Sie den übersetzten Link rechts.
Google Translate puede traducir documentos wiki a su idioma. Pegue la URL de la wiki en la ventana izquierda y abra el enlace traducido a la derecha.
Google Translate peut traduire des documents wiki dans votre langue. Collez l'url du wiki dans la fenêtre de gauche et ouvrez le lien traduit sur la droite.
Google翻訳はwikiドキュメントをあなたの言語に翻訳することができます。 左側のウィンドウにwikiのURLを貼り付け、右側の翻訳されたリンクを開きます。
Introduction
Due to the lack of the numerous Single Board Computers (SBC's) required for testing and integration, providing images for all Armbian supported SBC's, with Openmediavault (OMV) pre-installed, will not be possible. However, installing OMV5 on Armbian supported SBC's is a relatively easy task. This document is a guide for that purpose.
About this Guide
The purpose and intent of this guide is to provide a walk-through to get SBC users up and running as quickly and as easily as possible. This guide assumes that users have a working Windows Client for installing and executing the needed utilities. It is also assumed that Mac and Linux desktop users will be able to find, install, and use utilities equivalent to those called out in Prerequisites.
- This guide contains links to external sources of information and software. It's best used on an Internet connected PC.
- This is a community document and a work in progress. Input and feedback are welcome and can be sent to: omvguide@gmail.com
Not Supported
Desktop versions of Armbian
Armbian desktop versions are not supported and are used at the user's risk. If a desktop is used, SD-card backup is recommended.
Supported Devices
To see if an SBC of interest is supported by Armbian, visit the Armbian Download Page.
OMV5 will install on most SBC devices with Official Armbian support and a Buster image:
- Suitable For Testing , “WIP” (Work in Progress), and No Official Support images may work, but things may be broken. Use of these images is at the user's risk. These images could be considered to be in “BETA” state. Problems are to be expected.
- Use of End of Support (EOS) images is discouraged. The state of the OS is undetermined and it may not update normally. The install process may fail or, if the installation is successful, OMV may be (or become) unstable. Again, use of EOS images is at the user's risk.
- Use of any of the above image classes is not supported.
Prerequisites
This installation process requires a wired Ethernet connection and Internet access. Typically, all that is needed to begin the installation is an Ethernet cable, an Armbian supported SBC, a power supply sufficient for the SBC model being used, and one SD-card (two are preferred for backup).
To get started, a few utilities are needed to expand, check, and work with an Armbian image.
- Armbian Buster images are compressed with a .7z extension. Users will need the 7-Zip utility to decompress the image. 7-Zip is installable on a Windows client.
- To check the decompressed image, an MD5 – SHA Checksum utility is needed. This utility is portable, meaning it's not necessary to install it, but it may require support files. Simply run the executable.
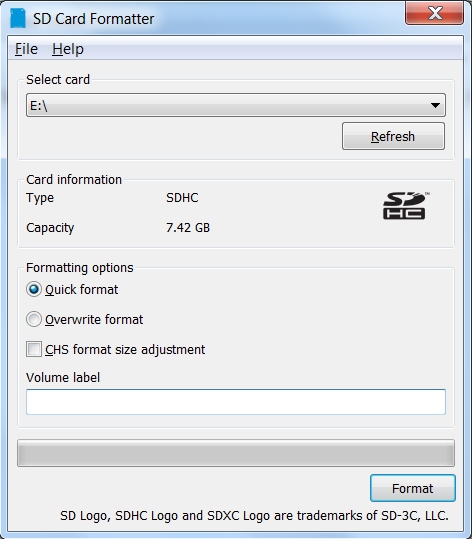
- SDformatter is a utility for formatting SD-cards, that does a trim operation on flash media to clear remnants of old files. SDformatter is installable on a Windows client.
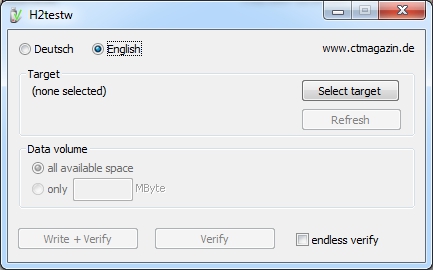
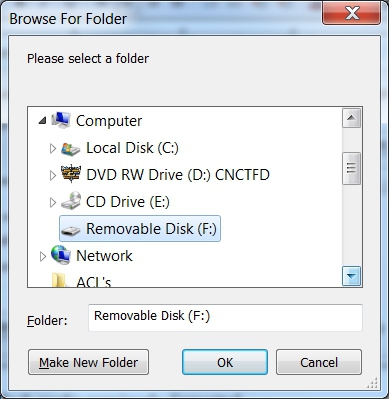
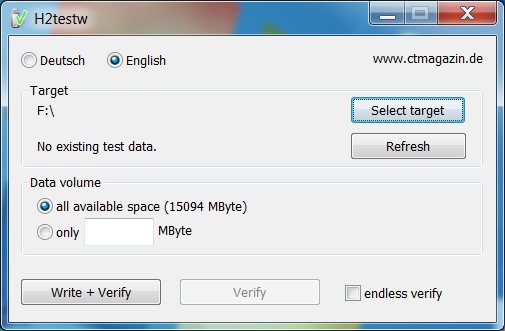
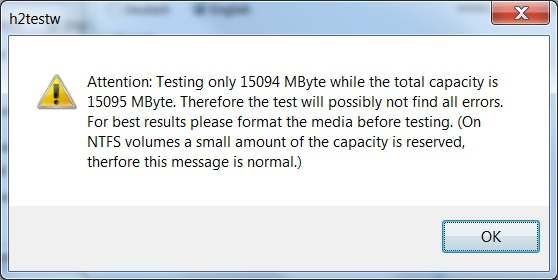
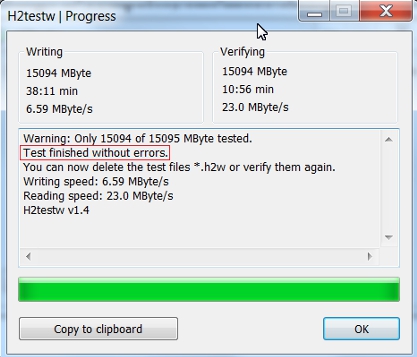
- h2testw_1.4 is a flash media test program. With a freshly formatted SD-card or USB thumbdrive, it writes files with known content and verifies the content in a read operation, detecting errors in the process. h2testw_1.4 downloads as a zip file. By right clicking on the zip file, and using “Extract All”, 7-Zip will expand the zip file to a folder named h2testw_1.4 The executable inside this folder is a portable application. Run the executable.
- To burn an Armbian Buster image to an SD-card, Etcher is recommended. (It burns the image and verifies it in one process.) Etcher is installable on a Windows client.
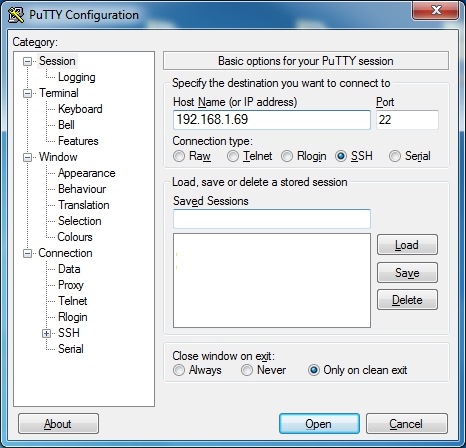
- PuTTY is an SSH client that will allow users to connect to their SBC, from a Windows client, and get on the command line. PuTTY is installable on a Windows client.
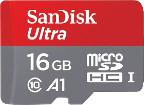
- While 8GB is the minimum and will work fine, a 16GB card will provide longer life in the role of a boot drive. Users are encouraged to get two SD-cards. One is for the installation and the second is for backing up the OS installation, when configuration is complete.
For the best experience, use only high quality new SD-cards, such as Samsung or SanDisk, that are rated A1 Class 10 or better.
- On the Armbian device page, select your device, then scroll down and click on Archived Versions.
- For best possible compatibility, when selecting an Armbian image to download, select an Armbian Buster image for your device that does not include a desktop.
- Download the SHA-256 hash file associated with the image file.
(Due to the potential for package conflicts, an image with a desktop is not recommended or supported. Lastly, Bionic, Stretch or other image varients will not work with OMV5.)
Working With the Image File
Decompress the Image:
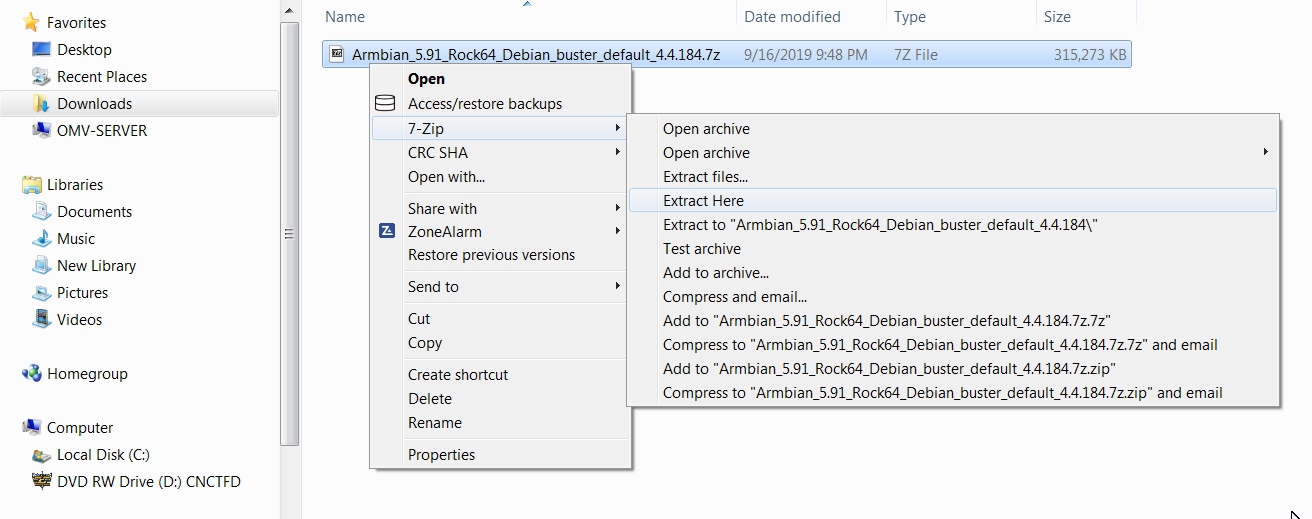
Armbian images are compressed and will need to be extracted with 7-Zip. Highlight the compressed file, right click the mouse, and make the menu selections shown below.
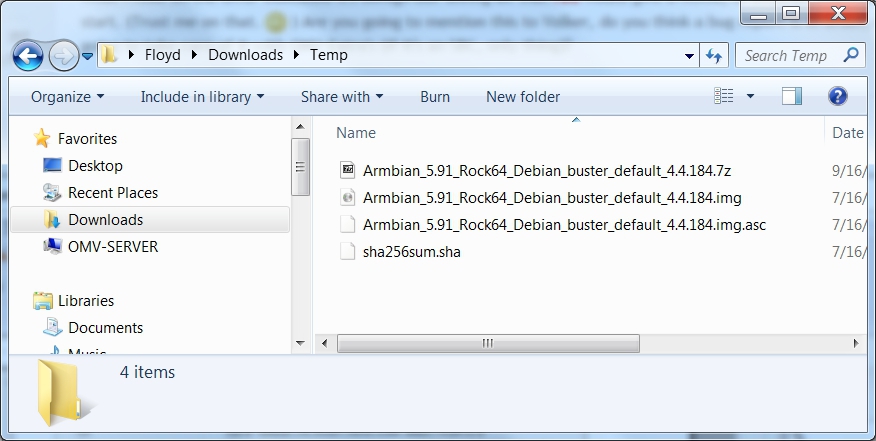
The result of the above action is the extraction of files into the current directory. The image file's extension is .img (For the purposes of this guide, the file ending with .asc can be ignored.)
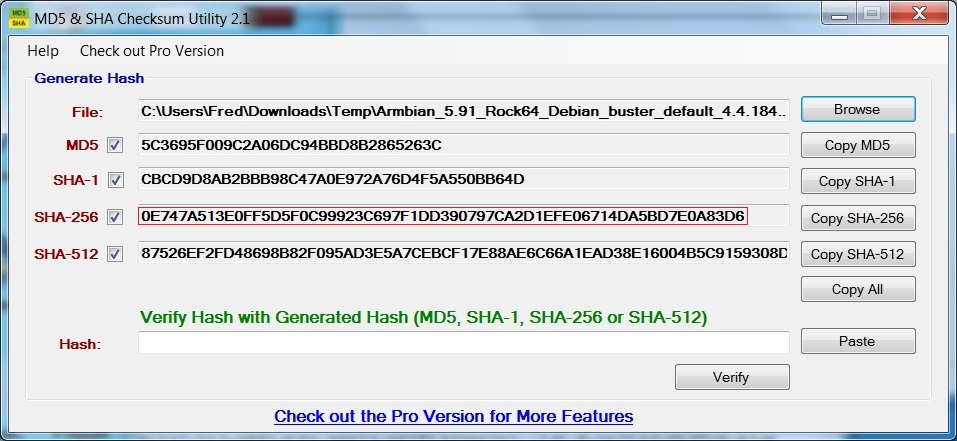
Verify the image
MD5 and SHA hashes check for image corruption that may have occurred during the download.
Beginners Note - DO NOT SKIP THIS STEP.
The chance of image corruption is highest when downloading and it's pointless to build a server with flawed software. Even the slightest corruption of the image may ruin your installation and the effects may not be noticed until well after your server is built and in use. Headaches can be avoided by checking the image.

Format and Test Flash Media
After H2testw verifies the SD-card; do one more clean format, using SDFormatter, before flashing the card. While optional, at this point, a volume label could be applied.
Flashing Armbian onto an SD-card
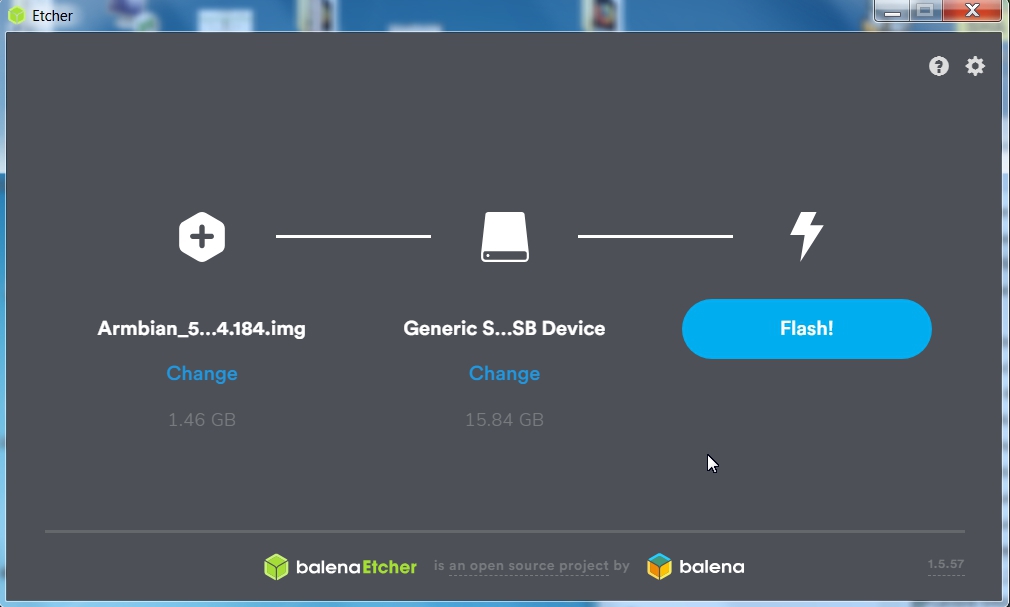
Etcher, in most cases, will auto detect the SD-card or a USB thumb-drive. Click on “Select Image” and navigate to the decompressed Armbian image. Then click on Flash!
- A windows confirmation dialog may pop up. (Click on OK.)
- Etcher will write the image, then verify it in one operation.
A “Success” flag will pop up when the job is finished and the Etcher window will display “Flash Another?”. The flash operation is complete.
The First Boot
*At this point, a wired Ethernet connection is required to connect to the SBC with PuTTY and to install OMV in a later process.*
- Insure the SBC is connect to wired Ethernet.
- Insert the SD-card, into the SBC, and apply power.
- Wait 3 to 5 minutes.
The IP address to use for logging into the console is available from your DHCP server. In most cases, your DHCP server will be running on your LAN's router.
(The following is an example.)
With the IP address noted, proceed to First Time Login.
- In the event that an IP address is not issued to your SBC, check the wired Ethernet connection and reboot the device. In some cases this will mean unplugging and plugging the power supply back in. Allow time for boot up (5 minutes or so) and check the DHCP server again.
- If an address is not issued, or if the user doesn't know how to find the ARM device's IP address on their DHCP server, connect a monitor and keyboard to watch the boot process until it completes. If the IP address is not displayed at the end of the boot cycle, login with the user root and password 1234
Unfortunately, this first time logon may kick off a mandatory root user password change and the addition of a non-root user. Once these processes are complete, type ip add on the command line. Note the IP address of the Ethernet interface, in the output, and proceed to First Time Login.
Armbian - First Time Logon
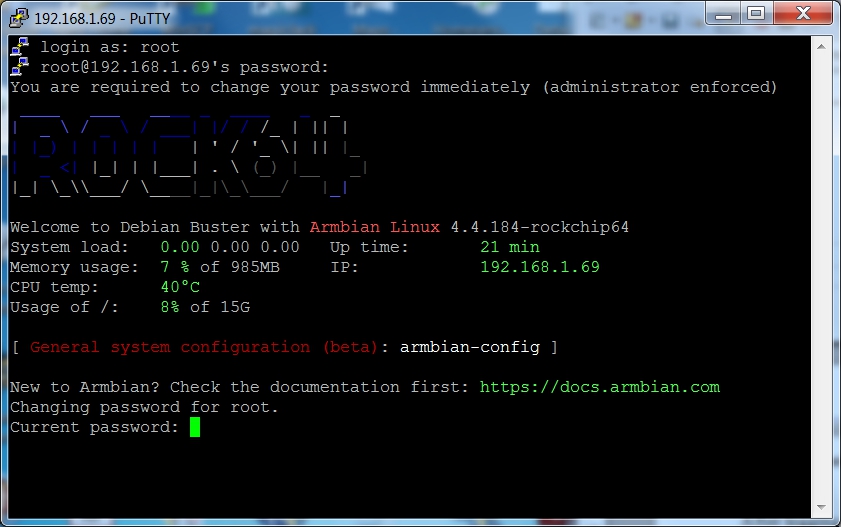
When the SSH window opens: Login as: root The Armbian default password is: 1234
After logging in with the default password, you'll be required to change the root password. Re-enter the current password 1234, then follow the prompts to enter and confirm a new root password. (Remember this password.) When the root password change is complete, Armbian will prompt to create a non-root user, with “sudo” admin abilities. Follow the prompts to complete the task. (If desired, this user can be altered, deleted, or replaced later. )
Finishing the Armbian Install
On the command line, copy and paste the following command into the SSH window:
apt-get update
When the command prompt returns copy and paste the following command into the SSH window:
apt-get upgrade
(This process with take a few to several minutes.)
Finally, reboot the SBC with the following command:
reboot
In a few minutes, open a new PuTTY/SSH window for the installation of OMV.
*In the event that the SSH client does not respond to the IP address used for the Armbian installation, look at your DHCP server to see if a “new” IP address has been assigned.*
Install OMV
Installing OMV on Armbian is very easy, thanks to Arron Murray (ryecoaaron on the OMV Forum) for providing a comprehensive installation script that's executed from a single line.
Highlight and copy the following line complete (Ctrl+C) and paste it into PuTTY's SSH window, with a right mouse click. Then hit Enter.
wget -O - https://github.com/OpenMediaVault-Plugin-Developers/installScript/raw/master/install | sudo bash
Once the script is running, click out of the SSH window so the script will not be interrupted. Note: Do Not close PuTTY – that will terminate the root session. Minimizing PuTTY is OK, but it must be running.
Depending on several factors, running this script may take up to 30 minutes.
When the script is complete, the SBC will automatically reboot.
First Time GUI Logon
After 3 to 5 minutes, OMV can be logged in using the same IP address that was used for the SSH client, entered in a web browser address bar. The web GUI user is admin and the default password is openmediavault
Note - after the completion of the script:
In the rare event that the OMV console or SSH client does not respond to the IP address used during the installation, recheck your DHCP server to see if a “new” IP address has been assigned.
(Typically, consumer router DHCP leases last at least 24 hours. In cases where DHCP leases are very short - as it is with some versions of DD-WRT router firmware [10 minutes] - the lease issued to the SBC may time out at the end of the installation. A different address may be issued on reboot.)
Finishing Up
New users can continue with the setup of OMV using the Getting Started with Openmediavault 5 guide, starting in the section titled →Initial Configuration.
All users are encouraged to review the section titled Operating System Backup for an easy process to clone your SBC's SD-Card.
Adding a Wireless Interface:
To add a Wireless Interface see Final Notes below. (Unless absolutely required, devices used in a server role should avoid wireless networking.)
A Closing Note
We, who support the openmediavault project, hope that you’ll find your openmediavault server to be
enjoyable, efficient, and easy to use.
If you found this guide to be helpful, please consider a modest donation to support the
hosting costs of this server (OMV-Extras).
OMV-Extras.org
Venmo: ryecoaaron

Final Notes:
Networking - General
The decision was made to depreciate NetworkManager in SBC's running OMV. The primary reason for this decision was to better support the installation and use of Dockers. Unfortunately, NetworkManager wreaks networking for Dockers.
Wireless Networking
First it should be noted that using a wireless interface, with a server, is not the best idea. To prevent a number of issues such as interference, bandwidth contention issues with clients, etc., a server should be connected to the wired LAN ports of a router or a network switch. However it is understood that, in some cases, wired connections may not be an option.
If your SBC is equipped with a wireless interface, by default OMV will not show it in the GUI but it can easily be added.
- An existing interface can be added as noted in the following.
- After plugging it in, a compatible add-on USB wireless interface can be added in the same manner.
(*In the example below, a wireless USB adapter is being added to a Rock64 without an onboard interface.*)
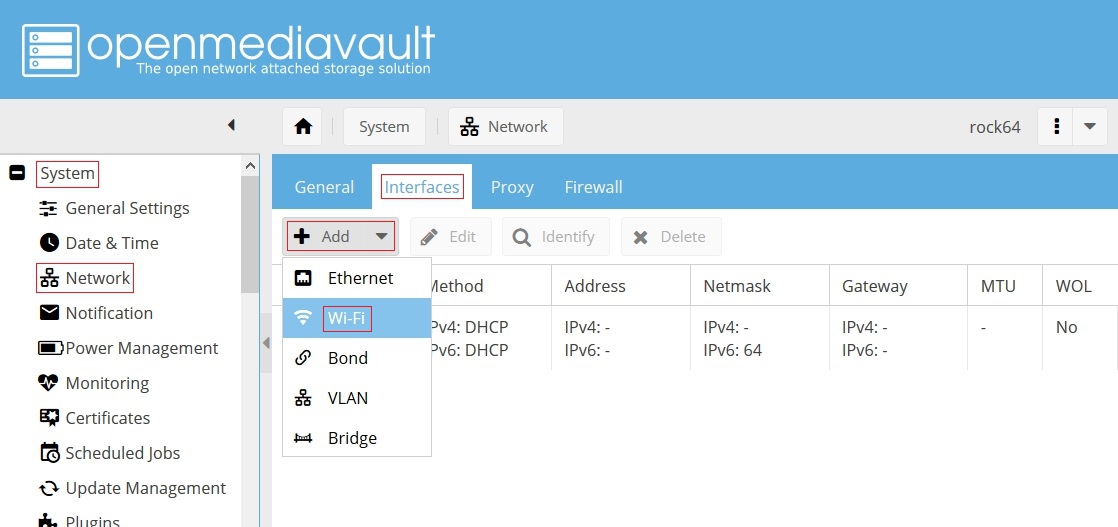
Under System, Network, in the Interfaces tab, click on the + Add button. Select Wi-Fi.
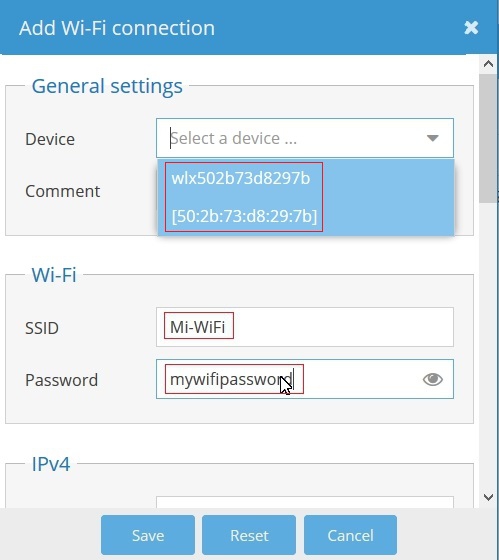
When the Add Wi-Fi dialog box pops up, select the drop down arrow next to Device. The on-board or add-on wireless interface will be the only interface in the list. Select it.
In the Wi-Fi section, add the SSID for the wireless network and the encryption Password.
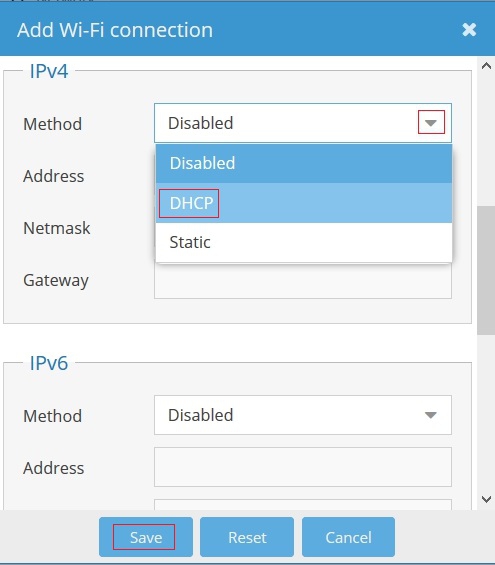
Using the right scroll bar, scroll down to IPv4. Next to Method, click the drop down arrow and make the appropriate selection. (DHCP is recommended for beginners.)
At this point, the wireless interface will appear under System, Network, in the Interfaces tab. Further configuration can be done, as needed, by editing the interface in the Interfaces tab.
To further configure the SBC; refer to the Getting Started with Openmediavault 5 guide, starting in the section titled Initial Configuration.

